Stripe Connect
Stripe Connect
On themes where members sell through your site, buyers pay you, and you then pay each seller their share. Stripe Connect does that last part for you. Each seller links their own Stripe account, and their share of every sale paid through Stripe is sent to them automatically, so you don't have to pay them by hand.
Setting it up takes about ten minutes, and each seller then needs a few minutes of their own.
What you need first
- A theme with seller payouts, such as the Auction, Marketplace, Classifieds, Booking, Freelancer Marketplace, Micro Jobs, Stock Photo or Video theme. On some themes your sellers are called businesses, freelancers or contributors. It works the same way for all of them.
- Stripe set up as a payment method on your site. If it isn't yet, follow Payment Gateways first.
- Seller payouts switched on, as shown in Paying your sellers.
Step 1: Turn on Connect in Stripe
Stripe needs to know you run a marketplace before your sellers can link their accounts to yours.
- Log in to your Stripe dashboard.
- Open Connect. If you can't see it in the menu, type "Connect" into the search box at the top.
- Click Get started and answer Stripe's questions about your marketplace.
Stripe may ask for a few details about your business. Once that's done, Connect is ready to use.
Step 2: Switch it on in your site
- Go to Checkout → Payouts.
- Check that your payouts switch is on. On the Auction Theme it's called Pay sellers through the site.
- Switch on Pay sellers through Stripe Connect.
- Click Save changes.
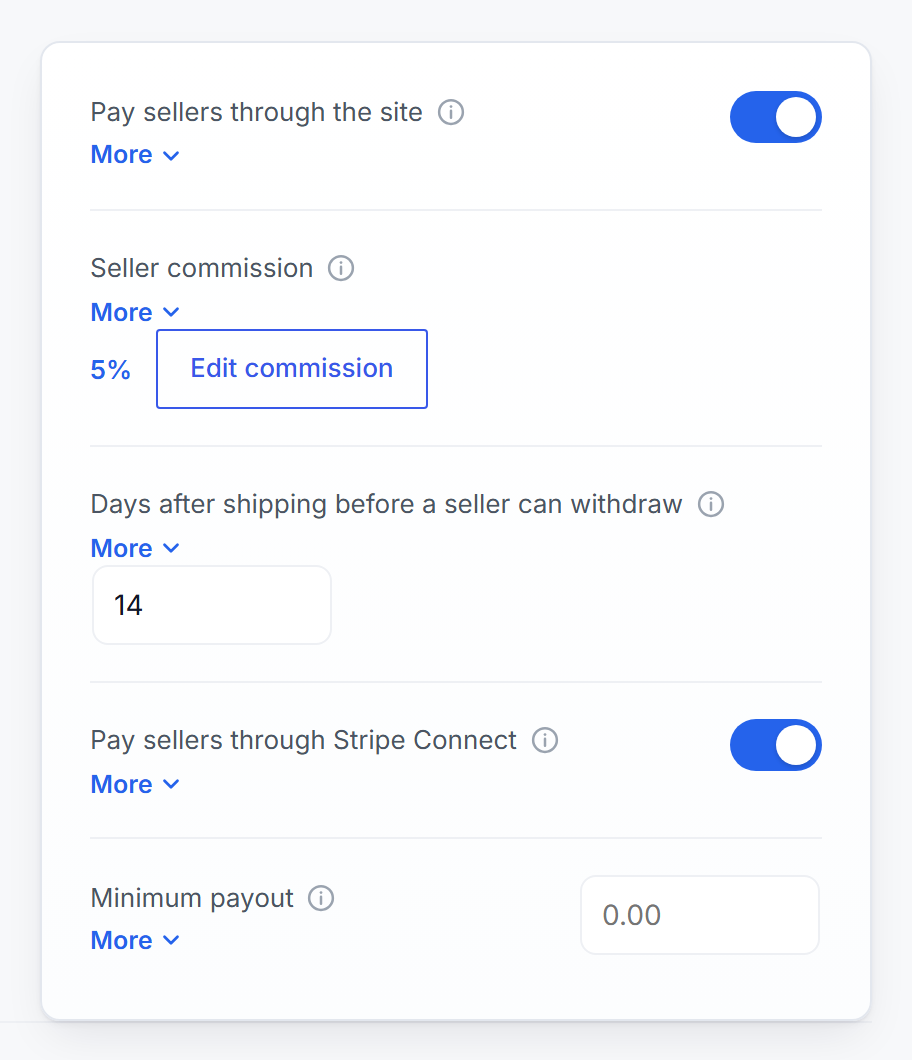
If you see "Stripe isn't set up as a payment method yet" under the switch, go to Checkout → Payment gateways and finish setting up Stripe first. The switch does nothing until Stripe is working.
Step 3: Your sellers connect their accounts
Your sellers now see a Get paid with Stripe box on the Earnings page in their account.

- They click Connect with Stripe.
- Stripe asks for their ID and bank details. This is Stripe's own sign-up, so their bank details go straight to Stripe.
- When they've finished, Stripe brings them back to your site.
If they stop part way, the button changes to Finish with Stripe, so they can carry on where they left off. Once they're connected, they get an Open Stripe button instead. It takes them to their own Stripe page, where they can see their payments and change their bank details.

It's worth asking your sellers to connect early on. Don't worry, a seller who hasn't connected yet doesn't lose anything. Their share of each Stripe sale simply waits until they do, and they can see the total as Waiting for Stripe on their Earnings page.
When sellers get paid
As soon as a sale is ready to be paid, your site asks Stripe to send the seller their share. That's the same amount you'd see for them on the Payouts screen. If your theme waits a few days before a sale can be paid, such as the Auction Theme's Days after shipping before a seller can withdraw, it's sent once those days are over.
Stripe then pays the money into the seller's bank on its usual schedule. Your commission stays in your own Stripe account.
A few things that are good to know:
- Each payment to a seller comes out of what the buyer paid for that sale, so Stripe never sends a seller more than it took for them.
- Once Stripe has sent a payment, the sale is marked as paid, with Stripe as the method, so your records stay up to date.
- Sales paid through Stripe that were still waiting to be paid when you switched this on are sent through Stripe too.
- If Stripe can't send a payment yet, for example because a seller still owes Stripe some details, your site tries again every hour.
Sales paid another way
Stripe Connect only covers sales the buyer paid through Stripe. Sales paid by PayPal, bank transfer or any other way work just as they did before, and you pay those by hand from Checkout → Payouts, as shown in Paying your sellers.
Refunds
If you refund a buyer before the seller has been paid, the seller's earnings are updated in the usual way, and only what's still owed is sent to them.
If you refund a buyer after Stripe has already sent the seller their share, your site doesn't take it back from the seller for you. You can do that yourself in your Stripe dashboard by opening the payment to the seller and reversing it. Stripe calls this reversing a transfer.
Trying it out first
If you'd like to see it working before your sellers use it, Stripe has a test mode. We'd recommend trying it on a copy of your site, such as a staging site from your host. That's because buyers can't make real payments while Stripe is in test mode, and a seller account connected in test mode only works in test mode.
- In Checkout → Payment gateways, set Stripe's Mode to Test and enter your Stripe test keys.
- Make sure Connect is turned on in Stripe, as in Step 1.
- Sign up as a test seller, click Connect with Stripe, and use Stripe's test details to finish the sign-up.
- Make a test sale. On the Auction Theme, set the days after shipping to 0 while you test, so the sale is ready to be paid straight away.
When you're happy, set Stripe back to Live with your live keys.
Switching it off
You can switch Pay sellers through Stripe Connect off at any time. Sales that haven't been sent yet go back to the usual withdrawal requests, and nothing that's already been paid is affected.
If anything's unclear, get in touch and we'll be happy to help.