WordPress 101 – Popular Tutorials to improve your WordPress skills.
One of the great things about WordPress is that you will find unlimited guides and tutorials online that will help you walk through every difficult step when setting up your website using WordPress.
In this article we will cover lots of useful topics to help you setup, manage and develop a website using WordPress.
How to install WordPress (manually)
If you are new to WordPress and you have no idea how to install WordPress on your website, then this guide is for you. There are various ways to install WordPress on your website. Most of the hosting companies these days provide a simple one-click WordPress installation.
If you are trying to install WordPress manually, then you should follow all the steps that will help you set up WordPress on your website. Here is a complete guide that will help you install WordPress on your website.
Step 1 - Download WordPress
First of all, you need to download a copy of WordPress software by visiting WordPress.org. Here, you will be able to find the latest copy of WordPress that you can download.
Once you have downloaded the latest WordPress software, you can log in to your site’s cPanel. After logging in, you will see this screen:

You need to click ‘File Manager’ and it will take you to another window. Here, you will have to click the folder named, ‘public_html’.

‘Public_html’ is the root folder where you will place the WordPress files. After opening the ‘pubic_html’ folder, you will have to click on the upload button placed on the top navigation bar.
It will take you to another window where you can upload the WordPress .zip file that you have downloaded.

Once the uploading of the WordPress.zip file is completed, you can go back to the root directory.

Here, you will have to extract the files and it will create a new folder named ‘WordPress’.
Move files from WordPress folder to directory rootHere is the one tricky step that you will have to take. Once you have extracted the files. You will see a WordPress folder. You need to open this folder and select all files inside it.

After selecting all files, click on the button named ‘move’. You need to move these files to the root directory where you are installing WordPress. Once you have moved the files, you are good to go to the next step.
Step 2 - Create a database
After placing the WordPress files in the main ‘public_html’ directory, you will have to go back to the main cPanel window. From here, you will navigate to ‘MySQL Database Wizard’.

From this wizard, you will start creating a database and database user for your WordPress website. In the first step, you will have to create a new database.

After creating a new database, click on the next step. At step 2, you will create a database user and password.

Make sure to save all this information at a safe place as you will require it again in the next step. You should save database name, database username, and database password.

After creating the user, you will have to assign the privileges to the user that you are creating. After assigning the required privileges, you can move on to the next step and finish creating a database and database user.

After creating a database and database user, you can move on to the next step which is editing and configuring the wp-config.php file.
Step 3 - Configuring wp-config.php file
The information related to the database that you saved earlier will be used in this specific step. You need to move to the ‘public_html’ folder and right-click on the file named, ‘wp-config-sample.php’.

Click edit and it will take you to another window where you will be able to edit the file.

Here, you will have to paste the database name, database user, and database password to their respective areas.
Once you have edited the file, you can save it and move back to the ‘public_html folder.

Now, you need to rename the ‘wp-config-sample.php’ file to ‘wp-config.php’.
Step 4 - Run WordPress Installation
After completing all the above steps, you can now run WordPress installation. Type in the web address of your website in the browser to start WordPress installation.

Select the language that you wish to use for your website and move to the next step.
As you have already changed the wp-config.php file, the setup will skip the configuration of the database file and will take you directly to the installation window.

After clicking ‘Run the Installation’, you will be able to see the window where you can site title, your WordPress username, and password.

After entering all the necessary information, click ‘Install WordPress’ and it will take you to the admin dashboard in a couple of seconds.

Your WordPress website is ready now and you can start editing your website.
Step 5 - Installation Completed!
Installing WordPress using these steps is extremely easy and you won’t face any hassle if you are following all the steps properly. Make sure to save database information that you are creating to avoid problems during the rest of the installation process.
How to install WordPress locally (localhost)
If you want to create a website locally on your computer using the localhost, then there is an easy way to do so.
All you have to do is to install a localhost program. There are various options out there that you can use to create a website without requiring a web hosting platform. However, we are going to use Xampp and will help you guide how you can install WordPress locally using Xampp.
Xampp will allow you to run a website locally from your computer and it has all the features that will help you in the development of your website. When your website is complete, you can transfer it to the live server as well. Let’s get started with the process of installing Xampp and then WordPress locally.
Installing Xampp on your computer
The first step to install WordPress locally is to install Xampp on your computer. To do so, you will have to download Xampp’s setup first. 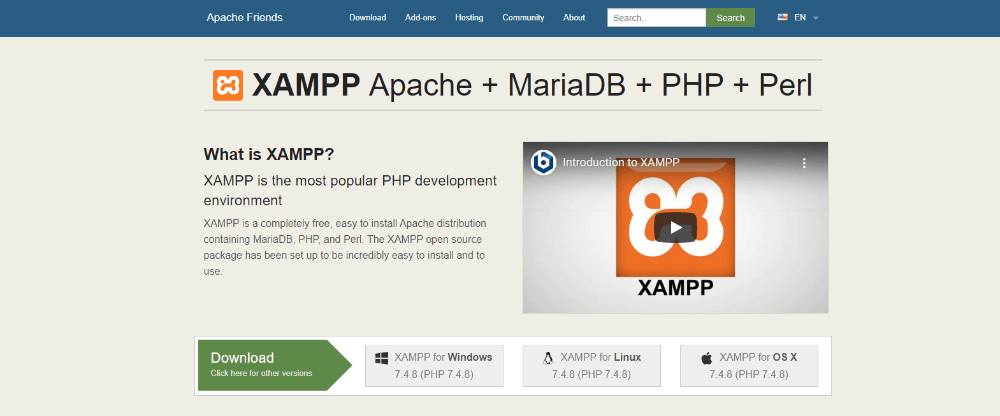
It can be a big file so it will take a minute or two to download depending on your internet connection. Once you have downloaded the setup, you need to start the installation process by clicking on the file you have downloaded.

The setup wizard will start. Click next to proceed to the next step.
 In the next step, the setup has checked all the boxes by default. You can proceed to the next step.
Here, you will have to select the location where you want to install Xampp. By default, it will go to your drive where you have installed Windows. If you need to change the location, you can do so in this step.

Once you are all set to start the installation process, you can click Next to start the installation.

Once the installation process is completed, you can move on to the next step and click ‘Finish’ to launch Xampp.

Start Xampp and test server
Now that you have launched the Xampp control panel, your computer screen will look like this:

Here, you need to start the first two modules. Make sure to click ‘Start’ on ‘Apache’ and ‘MySQL’ modules.

You can click on the Admin button in front of the ‘Apache’ module to see if the server is working fine.

If you have seen this window in your default browser, then you can move on to the next step which is adding WordPress files to the directory.
Download WordPress and add files
In this step, you will have to visit WordPress.org to download the latest version of WordPress. Once you have downloaded the WordPress software, you will have to extract these files.

After extracting WordPress files, you need to move to the location where you have installed Xampp. Go to the folder named ‘htdocs’ inside the folder of Xampp.

Here, you will have to paste the extracted WordPress folder and then change the name of the folder to the website that you wish to create. Here, we have changed it to ‘Newsite’.

Once you have pasted the files in the htdocs folder, then you can move on to create a database of your website.
Creating a database of your site.
To create a database of your website, you need to go back to the Xampp control panel. Here, you will have to click the ‘Admin’ button in front of the MySQL module.

A new window will open in the browser and here you can create a database of your website.

Here you will be able to create a database for the site you are creating. Make sure to remember this name as you will have to use this name again in the next step.

When you are creating a website locally, you don’t require a database username and password. After creating a database, you can move on to the next step.
WordPress Installation
To start the WordPress installation process, you need to type localhost/yoursitename in your browser and you will see a WordPress installation window.

Select the language you want to set and move to the next step.

Here, it will ask for the database information. All you have to do is to enter this information:
Database name:(The name you have created a database with in the last step.) Username:Root Password:(Leave it blank) Database Host:localhost After putting in this information, you can click ‘submit’ and it will take you to another window.

Run the installation process now.

Here, you will have to enter all the information including WordPress username and password that you wish to set. You can click the installation button.

Your WordPress is installed on the localhost and now you can create a website locally before putting it on the live server.
Conclusion
Xampp is one of the best and easy to use localhost program that you can find out there. There are multiple others that you can use. However, the process of installing WordPress will be similar in all of them. If you face any issues while installing WordPress locally, then you can get in touch with us through comments.
How to install a WordPress theme
One of the easiest ways to install a WordPress theme is by installing it through the WordPress admin dashboard. You can download the theme file to your computer. Once you have done that, then login to your WordPress admin dashboard.
Step 1
After logging into the WordPress admin dashboard, go to, Dashboard > Appearance > Themes. Here, you will be able to see default themes and there will be a button named, ‘Add New’ at the top of the page. 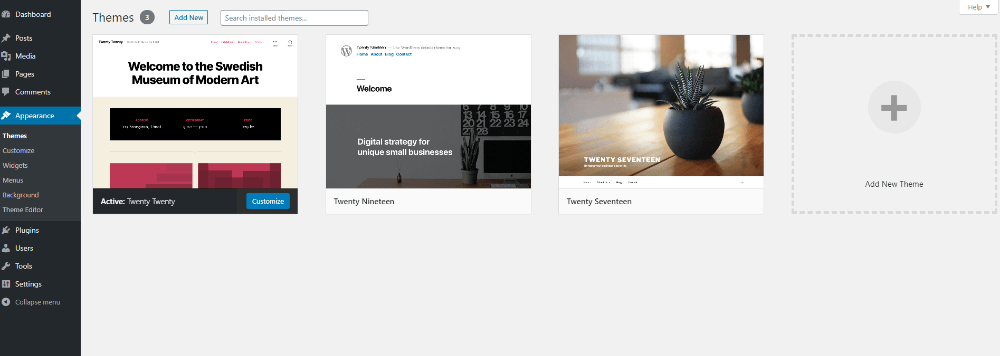
Step 2
Click that button and it will take you to another page. Here, you will see a list of themes in the WordPress theme repository. If you want to install a theme from the WordPress repository, then click on the theme that you wish to install.
If you want to upload the theme that you have downloaded earlier, then click the button named, ‘Upload Theme’ on the top of the page.

Step 3
Here, you can upload the .zip file containing the theme that you have downloaded. After uploading, it will start installing the theme.

Step 4
Once the theme is installed, it will give you an option to activate. You can click ‘activate’ and a new WordPress theme will be activated.

Installing a WordPress theme using cPanel
Installing a WordPress theme using cPanel is fairly straight forward however it is better if you have a basic knoweldge of cPanel and the tools available.
Step 1
To begin, you need to login to your website's cPanel.
Once you have logged in, you will go to File Manager.

Step 2
After clicking ‘File Manager’, a new window will open. You will see multiple files there. Click the folder named, ‘public_html’. Then go the path where WordPress themes are placed:wp-content > themes.

Step 3
Here, you will be able to see an upload button on the top bar. Click this button and a new window will open for uploading theme files.

Step 4
Here, you need to upload the theme files that you have downloaded on your computer.

Step 5
After uploading the files, go back to the theme directory. Here, you will be able to find a zip file that you have recently uploaded. You need to extract this file within this directory and refresh the directory.

Once you have uploaded the theme, go back to your WordPress admin dashboard > Appearance > Themes. Here, you will be able to see the newly added WordPress theme. Click activate and the new WordPress theme will be activated.
Installing a WordPress theme using FTP
Another easy way to install a WordPress theme is by using an FTP client. You can use FileZilla to upload a WordPress theme to your website. To do so, make sure you have all the necessary information including FTP host name, user name, password, and the right port.
Step 1
You need to use all the necessary information to log in through FTP. Once you are connected to the website’s server, you can upload a WordPress theme easily.

Step 2
In the remote site window, you need to access the folders containing WordPress themes. Go to public_html > wp-content > themes.

Step 3
Once you have entered the themes folder, you need to start uploading WordPress theme files to that folder from your local site (which is your computer in this case).

Step 4
Once the uploading is complete, you can head to the WordPress admin dashboard. Go to Appearance > Themes. Here, you will be able to see a new WordPress theme that you have added using FTP. You need to activate the theme by clicking activate and start using a newly added WordPress theme.
[VIDEOLIST]